🏠 vdwulp.github.io
📚 Arduino iButtonTag Library
![]()
![]()
![]()
![]()

An Arduino library handling iButton identification tags.
👍 Supported devices
| Model | Reading ID-code | Writing ID-code |
|---|---|---|
| DS1990, DS1990A, DS1990R, TM1990A | ✔️ | |
| RW1990, RW1990.1, RW1990v1, TM08, TM08v2 | ✔️ | ✔️ |
| RW1990.2, RW1990v2 | ✔️ | ✔️ |
| RW2004, TM2004 | ✔️ | ✔️ |
| TM01, TM01C | ✔️ | ✔️ |
| Many other iButton tags | ✔️ |
✈️ Installation
Using Arduino IDE Library Manager - Recommended!
- Open Arduino IDE
- Go to Tools > Manage Libraries…
- Search for “iButtonTag”
- Click Install
- Click Install All to also install required OneWire library
If you don’t see the Install All button mentioned in step 5, you have an older Arduino IDE (<1.8.10). Consider upgrading the IDE, or repeat steps 1 to 4 above to install OneWire library. In step 3 search for “OneWire”.
Manual installation
- Download the latest release ZIP file from iButtonTag releases
- In Arduino IDE, go to Sketch > Include Library > Add .ZIP Library…
- Select the downloaded ZIP file
- Repeat steps above to install required OneWire library; in step 1 download ZIP file from OneWire releases
🚶 Basic usage
Hardware setup
- Connect data line of iButton probe to an Arduino digital pin, this is the 1-Wire data line.
- Connect a 2200 Ω to 4700 Ω pull-up resistor between the 1-Wire data line and Arduino 5V pin.
- Connect ground line of iButton probe to an Arduino ground (GND) pin.
Code example
   #include <iButtonTag.h>                     // Include the library

   #define PIN_PROBE 2                         // Data line connected to pin 2

   iButtonTag ibutton( PIN_PROBE );            // Setup iButtonTag on the pin

   void setup(void) {
     Serial.begin(9600);
   }

   void loop(void) {
     iButtonCode code;                         // Variable to store ID-code

     Serial.println( "Reading... " );
     int8_t status = ibutton.readCode( code ); // Try to read ID-code

     if ( status > 0 ) {                       // Code read successfully
       Serial.print( "iButton code read: " );
       ibutton.printCode( code );              // ID-code is in variable _code_
       Serial.println();
     }
   }
More examples are available after installation in the Arduino IDE via File-menu > Examples > iButtonTag.
🏃 Advanced features
- Writing new identification code to (re)writable iButton tag models
- Reading multiple iButton probes on the same 1-Wire data line
🛠️ Hardware notes
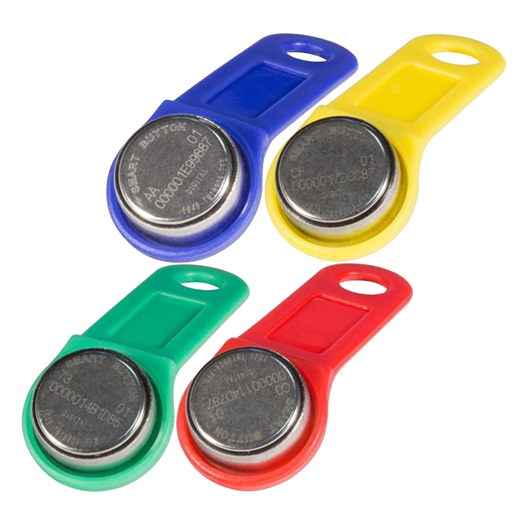
iButton identification tags
- iButton tags are used for many purposes, including as key to lock of office, hotel sauna or cabinet, also to (de)activate alarm systems and log attendance/time.
- Many iButton tags have their identification code engraved on them in hexadecimal: in the center the reversed tag specific 6-byte code, above it on the right side 1-byte family code and on the left side 1-byte checksum. When read by this library the order is: family code - tag specific code - checksum.
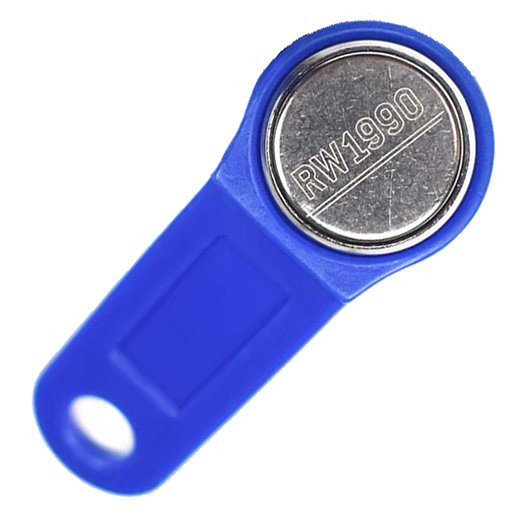
- Official iButton identification tags all have a unique identification code that cannot be changed. However, this library supports writing a new code to multiple types of (re)writable compatible tags.
- DS1990 (not DS1990A or DS1990R) can’t be used with multiple identification tags on a single data line and requires special handling. For details see comments on function readCode in reference documentation.
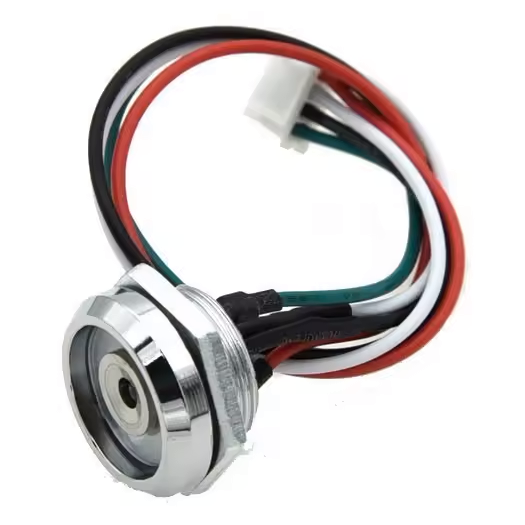
iButton probes
- iButton probes come in many forms, some have LED-indicator(s) with one or two colors, see some examples.
- No probe? No problem… see instructions in probe documentation.
Pull-up resistor
- The official recommendation is to use a 4700 Ω pull-up resistor between the 1-Wire data line and Arduino 5V pin when reading from an iButton tag.
- Writing a new code to (re)writable iButton tags may require more power for a successful and persistent result. To get more power to the tag, a 2200 Ω pull-up resistor between the 1-Wire data line and Arduino 5V pin has been tested to be a good value.
🔗 Quick links
📓 Documentation
Articles
Data sheets
🙏 Thanks
- The creator(s) of the OneWire library iButtonTag depends on. It’s a very solid implementation of the 1-Wire protocol. I learned a lot by studying the protocol documentation in combination with the source of this library.
- The creator(s) of the DallasTemperature library. When studying the 1-Wire protocol, working with the Dallas DS18B20 Temperature Sensor made everything more practical. In this period I also tried to contribute to this library.
🗒️ License
MIT License, full text available in LICENSE file.
Copyright (c) 2025 SA van der Wulp